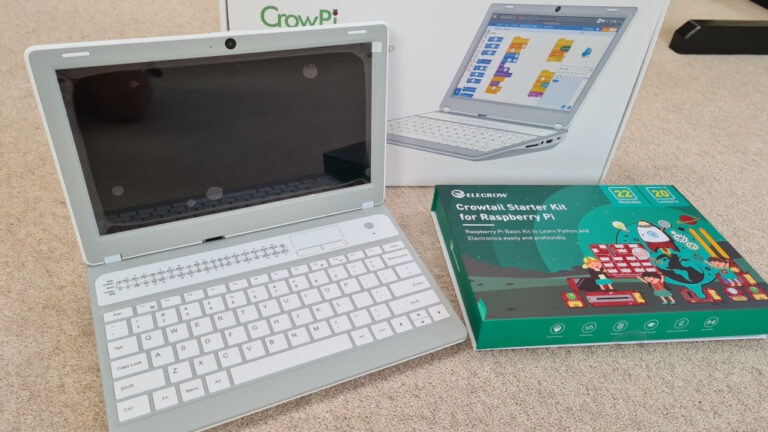
CrowPi L is a Raspberry Pi 4 based laptop created by Elecrow. It is a slightly different variation of the CrowPi 2 which was released in the summer or 2020. The idea is that the device is as portable as a laptop but with the ability to interface with the Pi’s various connectors and GPIO header.
Elecrow sent me a CrowPi L and Crowtail Starter Kit to review. They placed no restrictions on me and this article is my honest unbiased opinion.
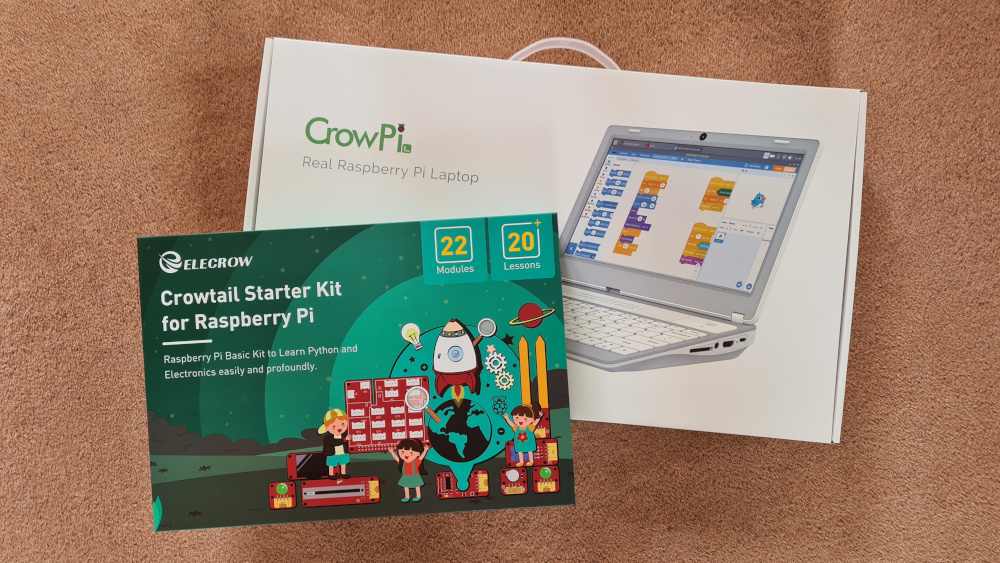
The packaging is all very professional and no different to items you might buy in a retail shop.
So lets take a look at the specification:
CrowPi L Hardware Specification
- 11.6-inch 1366×768 IPS screen
- 5000mAh internal battery (~3 hour runtime)
- Built-in keyboard and mini-touchpad
- 40-pin GPIO interface
- External HDMI socket
- Dual miniSD-card adapter with switch
- Magnetic mount for Pi board
- Internal cooling fan
- 1.1Kg
- 291(L)*190(W]*46(H)mm
Pi Ports
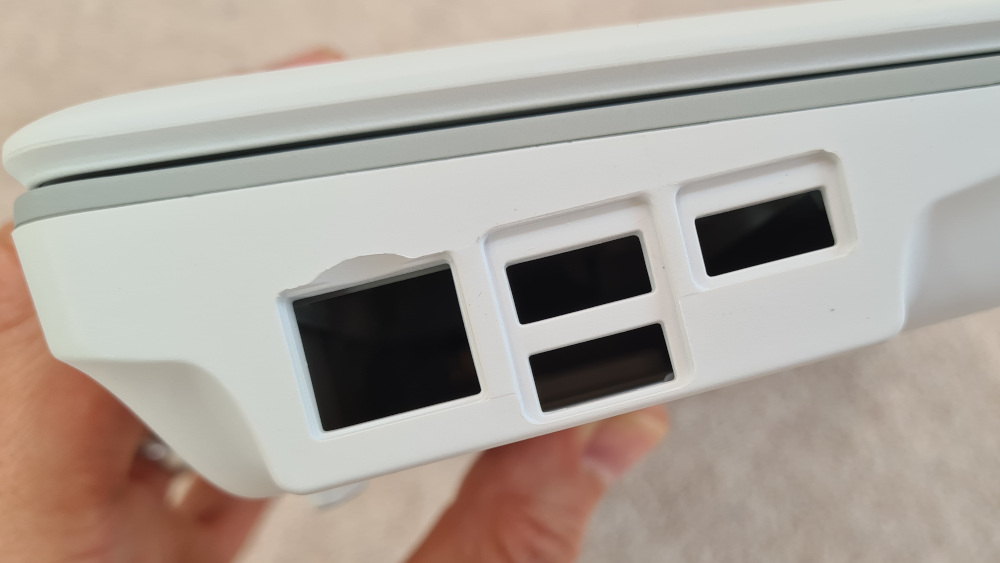
On the lefthand side you have the following ports available:
- Ethernet socket
- 2 USB 3.0
- 1 USB 2.0
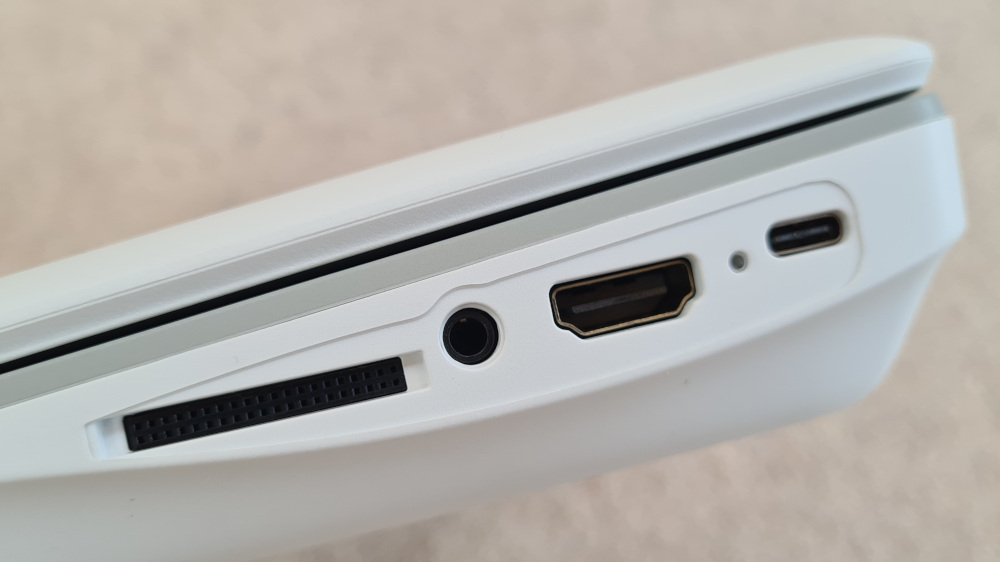
On the right-hand side you have:
- GPIO connector
- 3.5mm Audio Jack
- HDMI
- USB-C power socket (12V 2A)
Software
Elecrow provide a microSD-card image which includes a customised operating system. It is based on the Raspberry Pi OS but there are:
- 40 Letscode lessons – using a Scratch-like graphical programming system
- 56 Python lessons – a mixture of software and/or hardware lessons
- Pi Panel user interface providing links to all learning materials
- Battery widget to show remaining capacity
Features
Laptop Shell
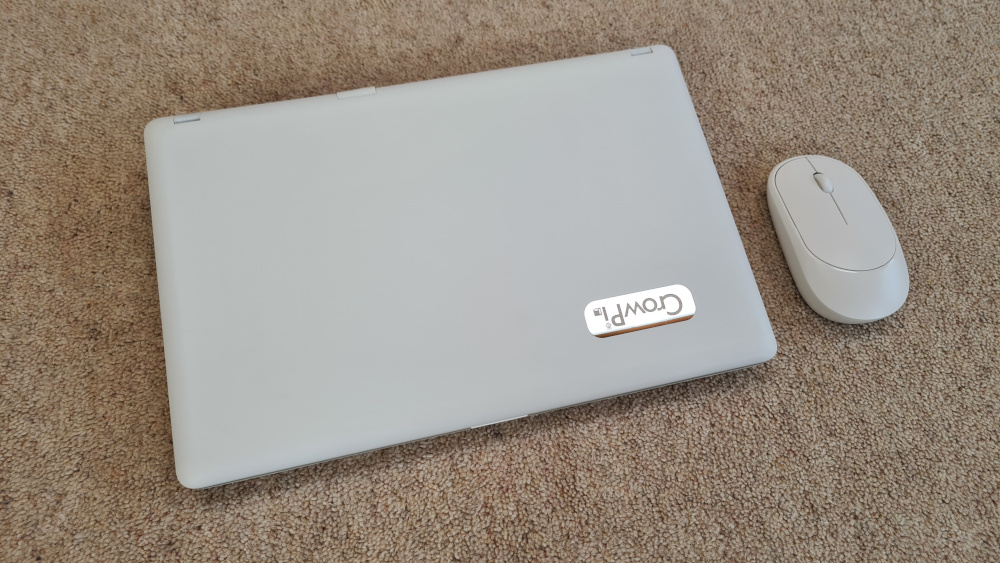
The most obvious feature is the main laptop style shell that encases the Pi 4. This is white plastic with a slightly textured matte finish.
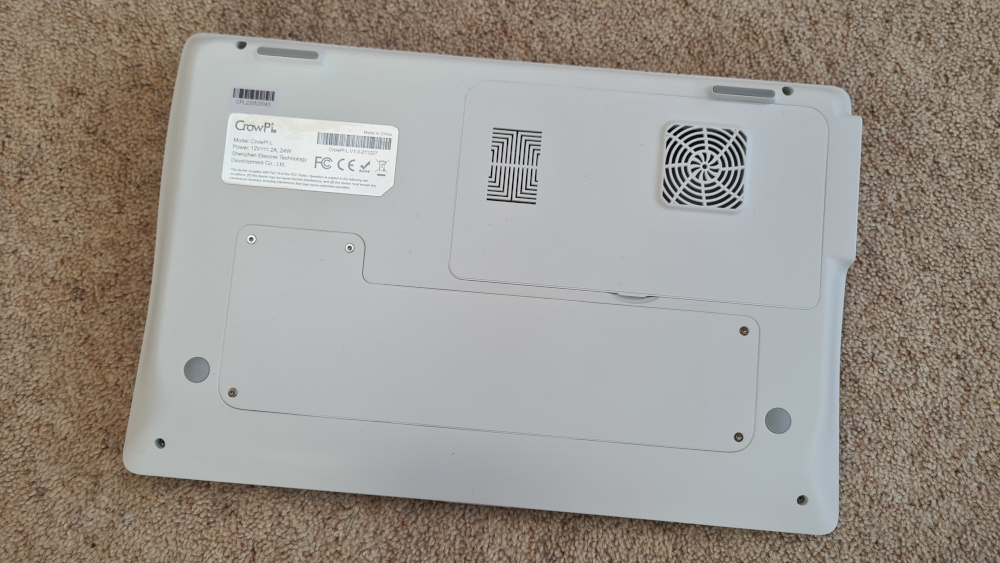
It has two panels on the bottom. One screwed in place to house the battery and the other for the Pi compartment. The Pi compartment lid includes a vent for the fan.
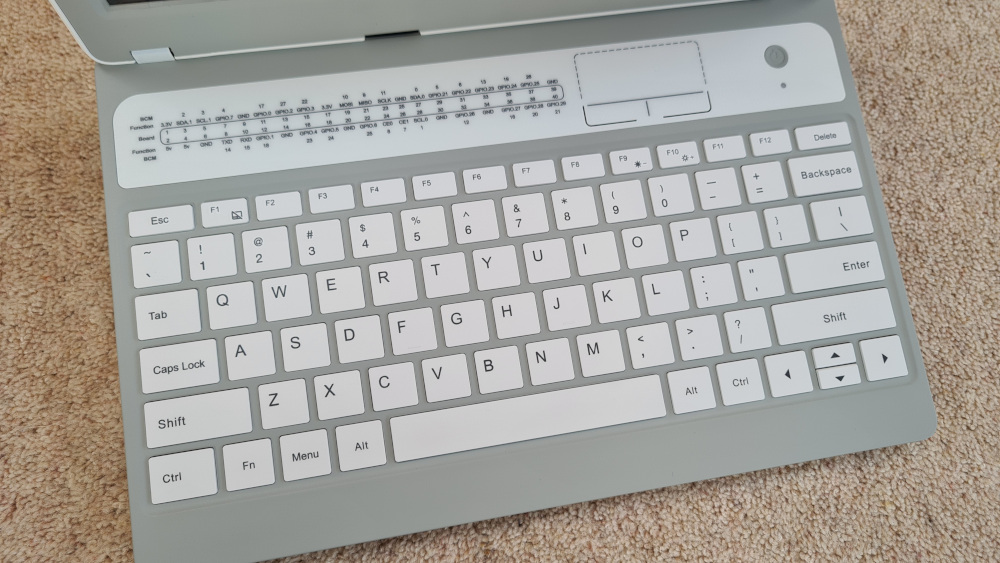
This panel is held in place with magnetic catches and is easy to remove by hand. The front surface features a GPIO reference image that identifies what GPIO references relate to the physical pins on the 40 pin GPIO header.
Screwless Pi Installation
The installation of the Pi is fairly straightforward but younger children will need some assistance. There are three custom white PCBs, two ribbon cables and the SD card adaptor to install. The ribbon cable connectors require some care but overall everything is plug-n-play. The Pi itself is cleverly held in place with magnets.
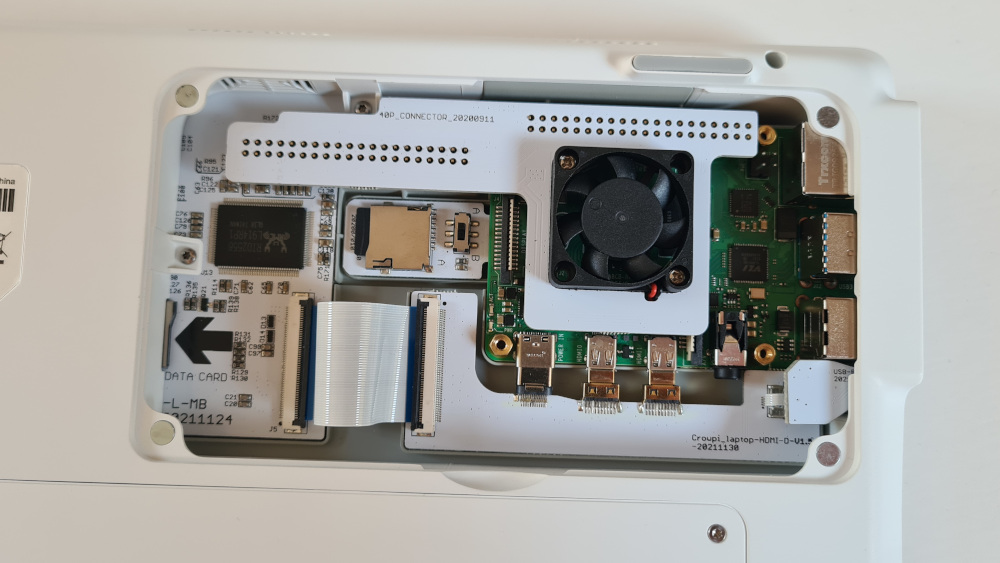
This setup is quite nice and avoids the messy cabling seen in other Pi based products.
The only issue I had with this setup is that changing the SD cards is fiddly because the fan board needs to be removed or at least loosened first. It’s worth installing both SD cards before you complete the assembly.
Screen
The CrowPi L has a 11.6-inch 1366×768 screen and the brightness can be controlled via the F9 and F10 keys. The viewing angles and colours are fine. Where the screen is a bit of a let down is the clarity of fonts. This may be something that can be improved in software but smaller text lacks the crisp edges of higher resolution screens. Even when the browser is zoomed in some lettering isn’t as clear as I would expect it to be.
However it should be noted that it is easy to plug in an external monitor. For desk based experimenting an additional monitor is always useful and the extra screen space makes programming easier. Even on my Thinkpad or work Elitebook I prefer using external monitors for development tasks.
Battery & Power
The 5000mAh battery can be charged using the USB-C port on the right-hand side. To get an idea of run time I charged it up and played YouTube videos, watched live news broadcasts and did some browsing. It lasted over 4 hours which was significantly past the 3 hours stated by Elecrow. It was good to have my expectations exceeded. Obviously this run time would vary depending on use but anything over 3 hours is excellent for this type of device.
The power button can be used to power up the Pi but to shutdown the Pi you need to do a software “Shutdown” from within the operating system. Holding down the power button will cut the power without a proper shutdown sequence.
The custom image includes a widget in the taskbar that gives an indication of remaining battery charge. It’s a 4 segment battery icon. This is a vital feature for a laptop but I would have liked to see some sort of percentage indicator to get a better idea of remaining charge.
Cooling Fan
The GPIO bridge PCB includes a small fan which cools the Pi 4. This fan runs continuously and you can hear it. I didn’t find it annoying but the sound is there. The warm air is pushed out of the vent on the base of the CrowPi L. This works fine as long as there is air-flow to the bottom of the case. If you put the CrowPi L on a soft surface (such as a sofa or a bed) it is possible that the vent would be blocked and the fan would struggle to cool the Pi. This isn’t a problem as long as you are careful where the device is placed.
Keyboard/Mouse/Touch-pad
The keyboard is as expected on a laptop in this price range and is perfectly adequate for it’s intend purpose. Given that three of the Pi’s USB ports are available, an external keyboard can be added if you prefer the feel of a larger keyboard.
The included mouse is a compact and light model. It uses a USB dongle and is therefore easy to swap with another model if you want something bigger.
The small touch-pad doesn’t look very impressive but was surprisingly usable. Using the mouse is a more practical option but the touch-pad is useful for quick tasks if you don’t have the mouse to hand. Larger touch-pads are available on other laptops but this would have increased the overall size of the CrowPi L.
Dual microSD-card Adapter
This adaptor allows you to fit two microSD-cards.
The cards can be selected using a simple A-B switch. This allows you to switch between two different operating systems. I placed the CrowPi L image in one slot and a RetroPie card in the other. By using the switch I could use the laptop for programming or games as required.
The only real issue with this setup is that replacing the SD cards is quite tricky. To get the cards out you need to partially lift off the GPIO bridge PCB which isn’t easy as it is firmly held in place with 2 banks of 40 pins. It’s a fantastic feature but it works best if you don’t change the cards very often.
Internal microSD-card Slot
There is an additional microSD-card slot that can be used to provide additional storage. It could be used to store code and projects without using the Pi’s main SD card.
Audio
There are two speakers mounted on the rear surface giving the CrowPi L stereo audio capability. The volume can be adjusted from within the OS. As with most laptops you may need full volume in a noisy environment.
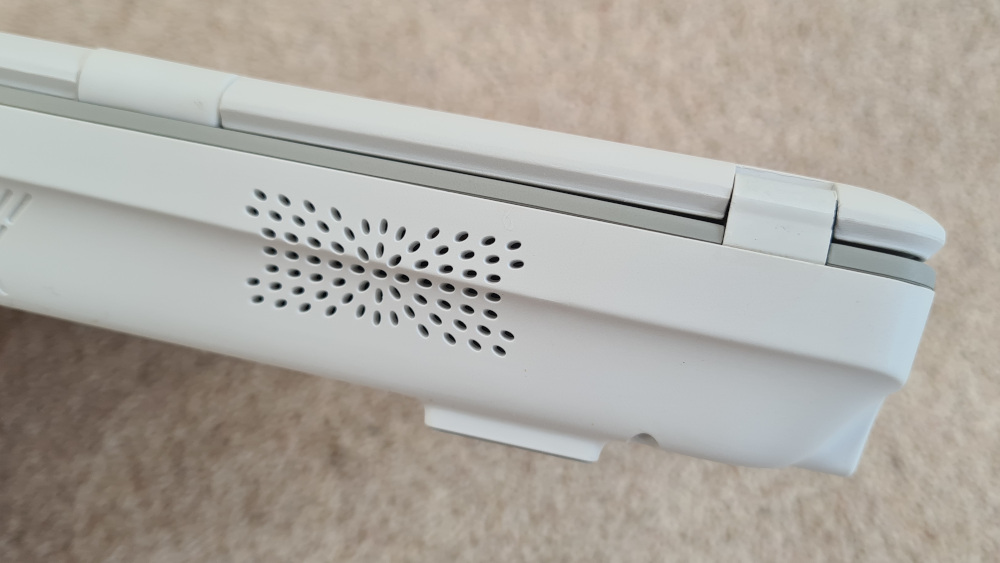
This photo also shows the small feet which lift the CrowPi L off a flat surface. This ensures there is a gap to allow warm air to be ejected from the underside vent.
Crowtail Starter Kit
As well as the CrowPi L I was also sent the “Crowtail Starter Kit”. This is a hardware kit that contains 22 modules that can be plugged into a base shield. The CrowPi L comes with it’s own base shield so with this kit it is possible to use it with another standalone Pi and share the modules. The instruction book contains a number of projects that explain how to connect up the hardware. The built-in software lessons guide you through creating the code to make use of the modules.
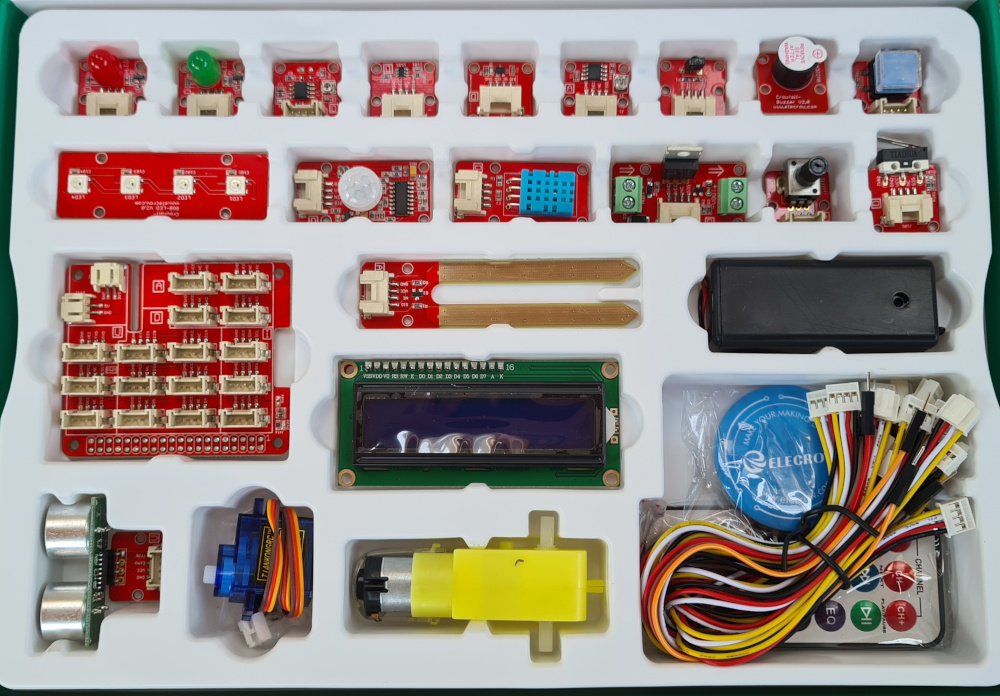
Modules include almost all the sensors and output devices you might want to experiment with. Although you can acquire these sort of devices elsewhere the easy to use connectors make connecting up the hardware much easier for beginners. Playing with jumper wires and soldering irons can be fun but the Crowtail approach allows you to make faster progress with the code.
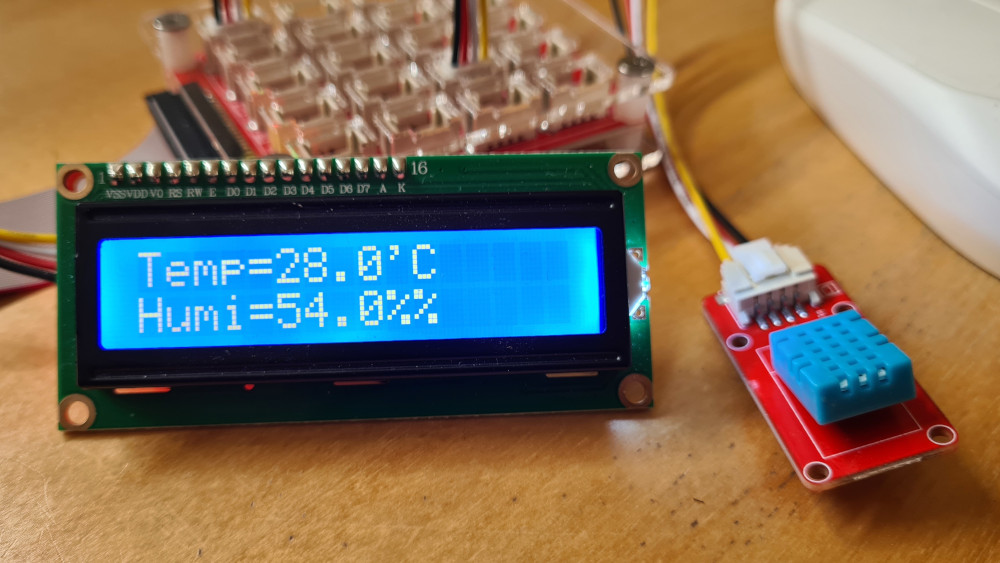
I played around with the “Weather Station” project and it was quite easy to get up and running.
Educational Goals
There is no right or wrong way to teach kids to program. You could learn with just a Pi 4 on it’s own but the CrowPi L makes it a lot easier to get hardware connected. This could work in a group setting with a teacher or simply allowing a single student to explore on their own. It would work best if adult support was available to guide and help younger children.
Overall Conclusion on the CrowPi
Overall I really liked playing with the CrowPi L. It’s got a few areas for improvement but these don’t prevent if from meeting it core goal of providing a portable Pi based learning platform. That is, providing a laptop, based on a Pi 4, that is truly portable. The battery has a useful runtime and the GPIO access means it is more useful for hardware projects than most other laptops you may have used in the past.
The GPIO access is the main selling point. Other laptops may offer more in terms of size, screen resolution or processing power but the possibilities for experimenting and learning with hardware are hard to beat. The dual-SD feature is an added bonus as the CrowPi L can quickly be turned into a gaming device when the owner has finished with the hardware projects.
Things I liked:
- The dual-SD card adaptor is a great idea and makes it easier for the CrowPi L to perform multiple roles
- The 5000mAh battery makes the CrowPi L truly portable
- Battery capacity widget makes it easy to keep an eye on remaining capacity
- Lessons and Projects accelerate learning and help people get results quickly
- Easy access to the GPIO
- Additional internal microSD-card slot for extra storage
Things that could be improved:
- The SD cards can’t be removed from the adaptor without partially removing the GPIO header PCB.
- The screen resolution is lower than the CrowPi 2
- Power button doesn’t do a graceful software shutdown
Other thoughts
It would be good if Elecrow sold a GPIO break-out board that allowed access to the GPIO header without needing to use the Crowtail base-shield.
Where to Buy?
The CrowPi L and Crowtail Starter Kit are available from the CrowPi page on the Elecrow website.
- CrowPi L Basic (no Pi 4 included) costs $204
- CrowPi L Advanced (no Pi 4 included) costs $254
You can buy the CrowPi with a Pi 4 included but it may be cheaper to use a Pi 4 you already have or source one locally. The high price of the Pi 4 is due to a global shortage and beyond the control of Elecrow.

