The Arduino IDE is a vital tool for flashing Arduino devices. You can install Arduino IDE on Raspberry Pi OS using these easy steps.
You could use apt:
sudo apt install arduinobut this results in the installation of Arduino IDE version 1.6. This is an extremely outdated version which makes it difficult to use or impossible to flash certain devices.
So I recommend manually installing the Arduino IDE using the software available from the official Arduino site.
I’m assuming you have a working installation of a recent Raspberry Pi OS image.
Download Arduino IDE Software
Firstly visit the Official Arduino website:
https://www.arduino.cc/en/software
Then click on the download labelled “Linux ARM 32 bits”. This should download a file that is named something like this “arduino-####-linuxarm.tar.xz” where #### is the version number.
Version Number
In the commands that follow you will need to replace #### with the version number. At the time of writing the version number is “1.8.13”.
Install Arduino IDE
Open a terminal window and ensure you are in the home directory:
cd ~Navigate to the Downloads folder:
cd DownloadsList the files in the Downloads folder using:
lsYou should see the Arduino IDE archive:
arduino-####-linuxarm.tar.xzNote the version number.
Extract the contents of the downloaded file:
tar -xf arduino-####-linuxarm.tar.xzThis should create a folder named “arduino-####” full of files.
Move the folder to /opt using:
sudo mv arduino-#### /optFinally complete the installation by running:
sudo /opt/arduino-####/install.shRunning Arduino IDE
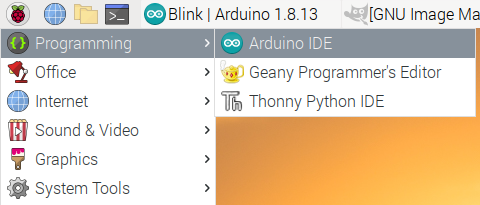
The installation process adds an entry into the Raspberry Pi OS menu. You can find the Arduino IDE entry under the “Programming” heading.

Clicking “Arduino IDE” will run the IDE.
Video How-To
The Arduino IDE installation process is covered in this video:
Adding Support for ESP8266 Boards (optional)
One reason for manually installing the Arduino IDE is that version 1.6 doesn’t allow adding support for additional devices. With the latest version we can add support for the ESP8266 family of boards.
In order to flash 8266 devices you can add a URL to the boards manager.
Select “Preferences” under the “File” menu:
In the “Additional Boards Manager URLs” paste in the following URL:
https://arduino.esp8266.com/stable/package_esp8266com_index.json
Click “OK” to complete the change.
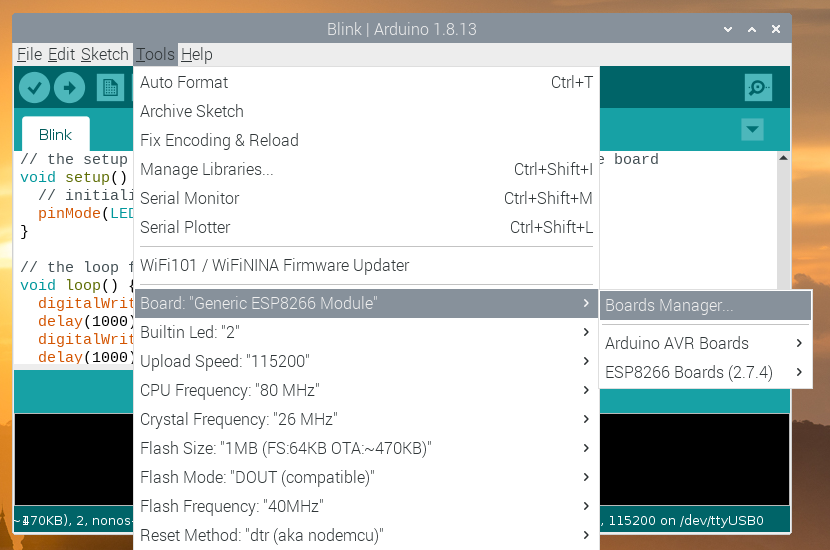
Now under the “Tools” menu select “Board” followed by “Boards Manager”.

In the search box type “8266” and press “Enter”. The search result should present you with “esp8266” by the “ESP8266 Community”.
Click “Install”
Under Tools > Board you should now have an entry for “ESP8266 Boards” containing a collection of ESP8266 based boards to choose from.


8 Comments
Thank you for the detailed description.
It’s possible to install the Arduino IDE in portable mode also, see the instructions here:
https://www.arduino.cc/en/Guide/PortableIDE
Excellent tutorial. For 64 bit PI you just have to use the ARM 64 bit download instead, everything else works the same.
Fantastic tutorial. Many thanks and much appreciated.
New version Would not work on my Pi 3 model B v1.2
Installed Arduino IDE 1.8.8 and it worked.
THANKS a lot for your help, I now have arduino 1-8.19 running on my raspberry pi4.
Great tutorial. Many Thanks
Thanks and it works too!
I realize this post is rather old, but as an update, using sudo apt does download the 1.8.19 version on RPi5.