The Raspberry Pi has a 1-wire bus which can be enabled on GPIO4. It provides low-speed data, signaling, and power over a single conductor. This is commonly used on the Pi to connect low-cost sensors devices such as the DS18B20 temperature sensor.
Step 1 – Enable 1-wire Interface
The default Raspbian image disables the interface by default so before you can use it we must make a configuration change. This can be done using either of three methods. I’ll describe all methods but the first one is probably easier and quicker.
Method 1 – Using “Raspi-config” on Command Line
From the command line or Terminal window start by running the following command :
sudo raspi-config
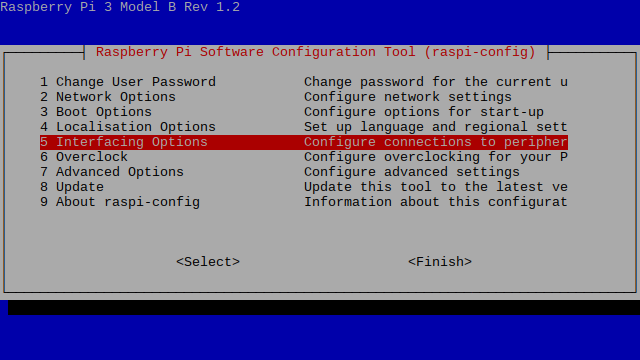
This will launch the raspi-config utility. Select “Interfacing Options” :
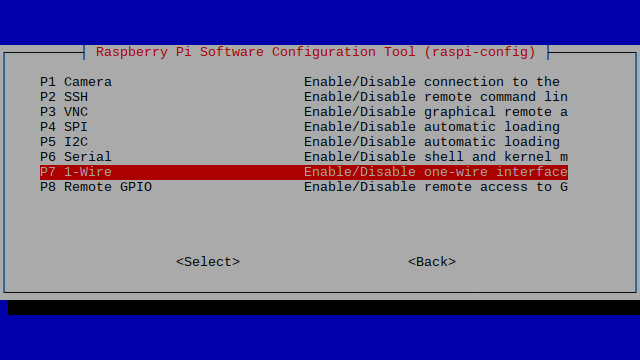
Highlight the “1-wire” option and activate “<Select>” :
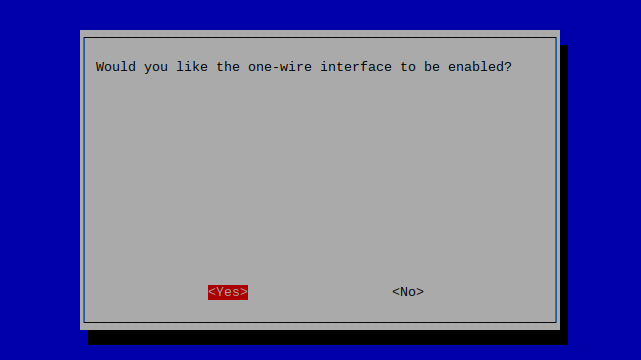
Select and activate “<Yes>” :
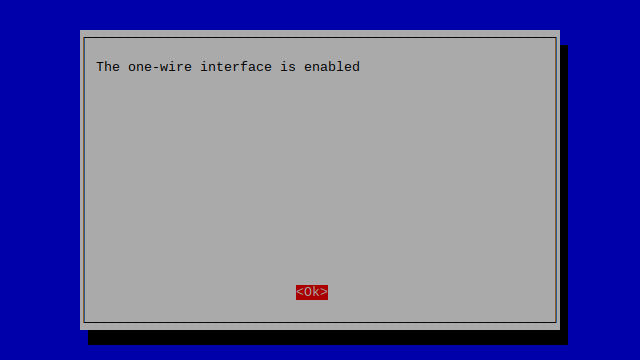
 Highlight and activate “<Ok>” :
When prompted to reboot highlight and activate “<Yes>” :

The Raspberry Pi will reboot and the interface will be enabled ready for use.
Method 2 – Using “Raspberry Pi Configuration”
If your Pi boots to the desktop you can either open a Terminal window and use Method 2 or use the graphical tool “Raspberry Pi Configuration”. This is found under : Menu > Preferences > Raspberry Pi Configuration
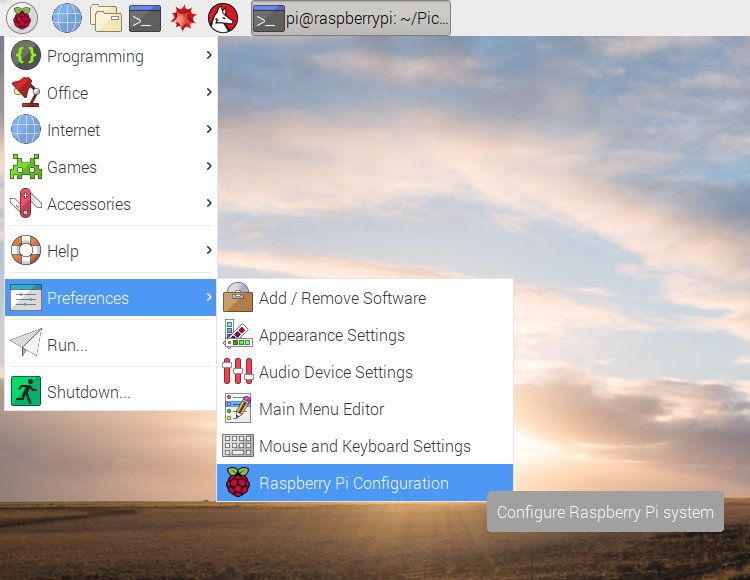
Then you simply need to select the “Interfaces” tab and set 1-Wire to “Enabled” :

Click the “OK” button. If prompted to reboot select “Yes” so that the changes will take effect.
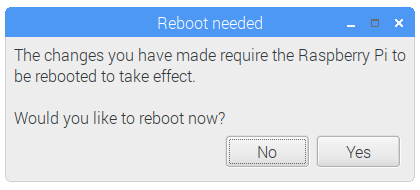
The 1-Wire interface will be enabled when the Raspberry Pi has rebooted.
Method 3 – Enabling By Editing A File Manually
This process assumes you are using the latest Raspbian build from the official downloads page. You can update your current image using :
sudo apt-get update
sudo apt-get upgrade
To enable the interface on the Pi we need to make a modification to a system file :
sudo nano /boot/config.txt
Add the following line at the bottom :
dtoverlay=w1-gpio
Use CTRL-X, then Y, then RETURN to save the file and exit.
This will use Pin 7 (GPIO4) by default.
Reboot using the following :
sudo reboot
Listing Attached 1-Wire Devices
With the interface enabled you can list all discovered devices using the following command :
ls /sys/bus/w1/devices/
A full list of tutorials featuring this interface can be found by clicking here.
Reading temperature with the popular DS18B20 temperature sensor is explained in the Using DS18B20 Digital Temperature Sensors with the Raspberry Pi post.
Finally, there is more technical information about 1-Wire interfaces on the Wikipedia page if you are interested.

2 Comments
Can the 1-wire protocol be enabled for other GPIO pins? I have a project that has 18 DS18B20 probes mounted underground and now covered with cement. When I built the probe array, it worked fine but then–just before the array had to be placed in the ground, it began giving error values. In discussions with Maxim Integrated, it appears that the “star” configuration I was using was causing signal reflections to interfere with the read values. Breaking the “star” into three separate inputs would likely resolve the problem, but the literature suggests that only the Pi’s Pin 7 offers 1-wire. If I could use two other GPIO pins, I might be able to salvage the data I hope to gather….
I think it is possible to enable the 1-wire protocol on more that one GPIO. If you edit the config.txt file you can add multiple overlay definitions. E.g.
dtoverlay=w1-gpio,gpiopin=4 dtoverlay=w1-gpio,gpiopin=17