Flask is a Python based micro-framework for creating web pages. It can be used to present web-based interfaces on the Pi and is relatively easy to setup. It’s useful for creating dashboards and I first came across it when looking for a method of creating my paddling pool control panel.
This tutorial will explain how to create a basic site to get you started. Once you’ve got an example working the official documentation can be used to move onto more advanced topics.
I use Python 3 in this tutorial. It should work the same with Python 2 but you will need to replace all references to “python3” with “python”.
Create a fresh SD card
To avoid conflicts with other software you may have installed I would recommend starting off with a fresh SD card by writing the latest Raspbian image to it. I use etcher to write Raspberry Pi images and for my initial experiments with Flask I used the Jessie Lite image from the official download page.
Enable SSH
By default SSH is disabled. If you want to configure the Pi over the network from another computer it can be enabled by either :
- Creating a blank file named “ssh” in the boot partition (In Windows this is the only partition you can access)
- Using the raspi-config utility to enable SSH with a monitor and keyboard attached to the Pi
Take a look at the Enabling SSH on the Pi guide for more information.
Find IP Address
Find out the IP address of your Pi. If you are using a monitor and keyboard you can run:
ifconfig
It will most likely be of the form 192.168.#.#. When writing this tutorial my Pi was using 192.168.1.19.
If you are connecting remotely via SSH then you can use an IP scanner to find it or it will listed somewhere in your router settings.
Update & Change Password
When enabling SSH I would strongly recommend changing the default password from “raspberry”!
Use :
passwd
Set the new password and then run :
sudo raspi-config
Select “Advanced” followed by “Expand Filesystem”.
To ensure we will be installing the latest packages run the following two commands :
sudo apt-get update
sudo apt-get -y upgrade
This process may take 5-10 mins.
Install pip
Before we can install Flask we need to install pip, the Python package manager :
sudo apt-get -y install python3-pip
Install Flask
Now it’s time to install Flask :
sudo pip3 install flask
I received some errors in the output but at the end it reported “Successfully installed flask”.
Create test Flask app
Now that Flask is installed we need to create a small test site to check everything is working. In this tutorial I will assume the test site is called “testSite”. You can use whatever name you like but you will need to swap all references to “testSite” with your name. Create a new folder :
cd ~
mkdir testSite
Navigate to the new folder and use the following command to create a new Python script :
cd testSite
sudo nano testSite.py
Then paste in the following code :
from flask import Flask
app = Flask(__name__)

@app.route("/")
def index():
 return "<html><body>
<h1>Test site running under Flask</h1>

</body></html>"

if __name__ == "__main__":
 app.run(host='0.0.0.0',debug=True)
Press “CTRL-X”, “Y” and “Enter” to save and return to the command prompt.
This script defines a simple one page website.
Testing the Python web server
You can now run the script using :
python3 testSite.py
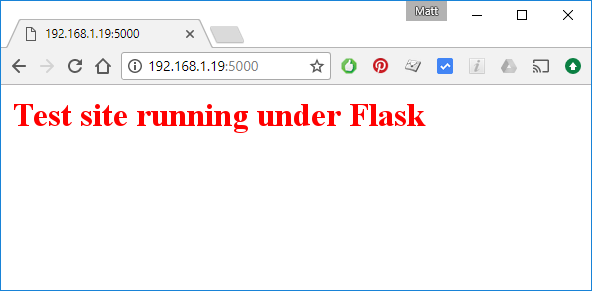
If you visit the IP address of your Pi in a browser the test site should be visible :

Note that Flask uses port 5000 by default and you need to replace 192.168.1.19 with your Pi’s actual IP address.
Adding additional pages
The script can be modified to add additional “pages”. Take a look at the example below :
from flask import Flask
app = Flask(__name__)

@app.route("/")
def index():
 return "<html><body>
<h1>Test site running under Flask</h1>

</body></html>"

@app.route("/hello")
def hello():
 return "<html><body>
<h1>This is the hello page</h1>

</body></html>"

if __name__ == "__main__":
 app.run(host='0.0.0.0',debug=True)
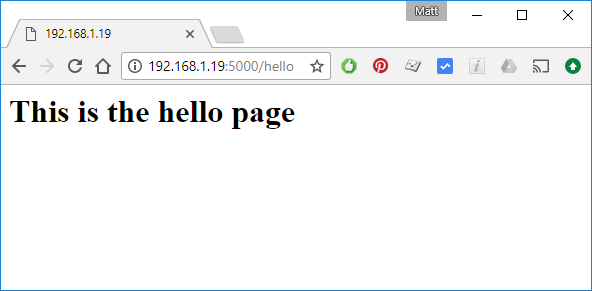
It adds an additional “route” called “hello”. This page will be displayed when you visit the hello sub-directory :

Even more routes
You can also pull information from the URL into your script to create more elaborate page combinations. In this example we’ve added /user/<username> and /post/<post_id> routes.
from flask import Flask,render_template
app = Flask(__name__)

@app.route("/")
def index():
  data=['Index Page','My Header','red']
  return render_template('template1.html',data=data)

@app.route("/hello")
def hello():
  data=['Hello Page','My Header','orange']
  return render_template('template1.html',data=data)

@app.route('/user/<username>')
def show_user(username):
    # show the user profile for that user
    return 'User %s' % username

@app.route('/post/<int:post_id>')
def show_post(post_id):
    # show the post with the given id, the id is an integer
    return 'Post %d' % post_id

if __name__ == "__main__":
  app.run(host='0.0.0.0',debug=True)
Enter <ip_addr>:5000/user/john or <ip_addr>:5000/post/42 and a page is displayed with either the name or the post ID as part of the content.
Using templates pages
Rather than define your HTML page within the script you can use template files to hold the bulk of the HTML. This makes the script much easier to handle when your pages are a bit more complicated.
Flask looks for templates in the “templates” directory. Create a new directory for templates :
mkdir /home/pi/testSite/templates
cd /home/pi/testSite/templates
nano template1.html
Then paste in this example template :
<!DOCTYPE html>
<html>
<head>
<title>{{ data[0] }}</title>
<link rel="stylesheet" href='/static/style.css' />
</head>
<body>
<h1>{{ data[1] }}</h1>
Favourite Colour : {{ data[2] }}
</body>
</html>
The testSite.py can then be updated with :
nano testSite.py
and the content replaced with :
from flask import Flask,render_template
app = Flask(__name__)

@app.route("/")
def index():
 data=['Index Page','My Header','red']
 return render_template('template1.html',data=data)

@app.route("/hello")
def hello():
 data=['Hello Page','My Header','orange']
 return render_template('template1.html',data=data)

if __name__ == "__main__":
 app.run(host='0.0.0.0',debug=True)
When the two “routes” are activated the same template is used but the values passed to it are differnet. So the visitor sees a slightly different page.
You can enhance the templates with HTML and CSS. The great thing with templates is that they keep the main Python script focused on functionality and leave the layout and aesthetics to the template file.
Debug Mode
In the examples the “debug” flag is set to True. This runs Flask in debug mode which automatically reloads Flask when you update the script. It also provides error messages if the page fails to load. If you expose the site to the internet the debug flag should be set to False.
Auto-running Script on Boot
If you want the Python script to automatically run when the Pi boots you can use this technique:
crontab -e
If prompted select an editor to use. I tend to use “nano”. Insert the following line at the bottom of the comments block :
@reboot /usr/bin/python3 /home/pi/testSite/testSite.py &
Press “CTRL-X”, “Y” and “Enter” to save and return to the command prompt.
When you reboot this will run “testSite.py”. The “&” ensures it runs in the background.
sudo raspi-config
Select “Boot options” and “Desktop/CLI”. The select “Console Autologin”. This means when the Pi boots it will automatically login as the Pi user.
Reboot using :
sudo reboot
and your webpages should be available at the Pi’s IP address on your network.
Download Scripts
The example scripts and templates in this tutorial are available in my BitBucket repository. They can be downloaded using these links : testSite1.py testSite2.py testSite3.py testSite4.py template1.py
You can download directly to your Pi using :
wget <url>
where <url> is one of the script URLs above. Remember to download the files to the correct directory. Templates should go in the “templates” directory.
Official Documentation & Other Resources
There is a lot more information on the official Flask documentation page.
It’s also worth taking a look at the Raspberry Pi Foundation – Build a Python Web Server with Flask tutorial.


6 Comments
There’s a small typo. When you’re creating the template, you have:
nano index.html
but you really mean
nano template1.html
Other than that, a good introduction to a lot of neat stuff.
— Graeme
Thanks for spotting that! I’ve updated the article.
Not to mention that the first example’s HTML creates a header with the test “Test site running under Flask” while the display output shows “This is a test site.” Ooops!
I’ve updated the screenshot to make it more consistent. I did the original and then tidied up the HTML 🙂
Do you need to set the document type with Flask? I tried the same thing with a NodeJS based approach and the HTML rendered fine on some browsers but gave me raw text on a phone browser.
I’m not entirely sure but the example templates in the Flask documentation set it.