motionEyeOS is an awesome system for creating security cameras with single board computers. This can include systems to monitor pets or burglars. It has a number of nice features under the hood and one of those features is the ability to monitor GPIO pins and display information within the motionEyeOS web interface.
The “monitoring” feature allows you to run a bash script at a regular interval and overlay the text output on the web interface. This could be used to display the state of GPIO pins or other data such as CPU temperature, sensor readings etc.
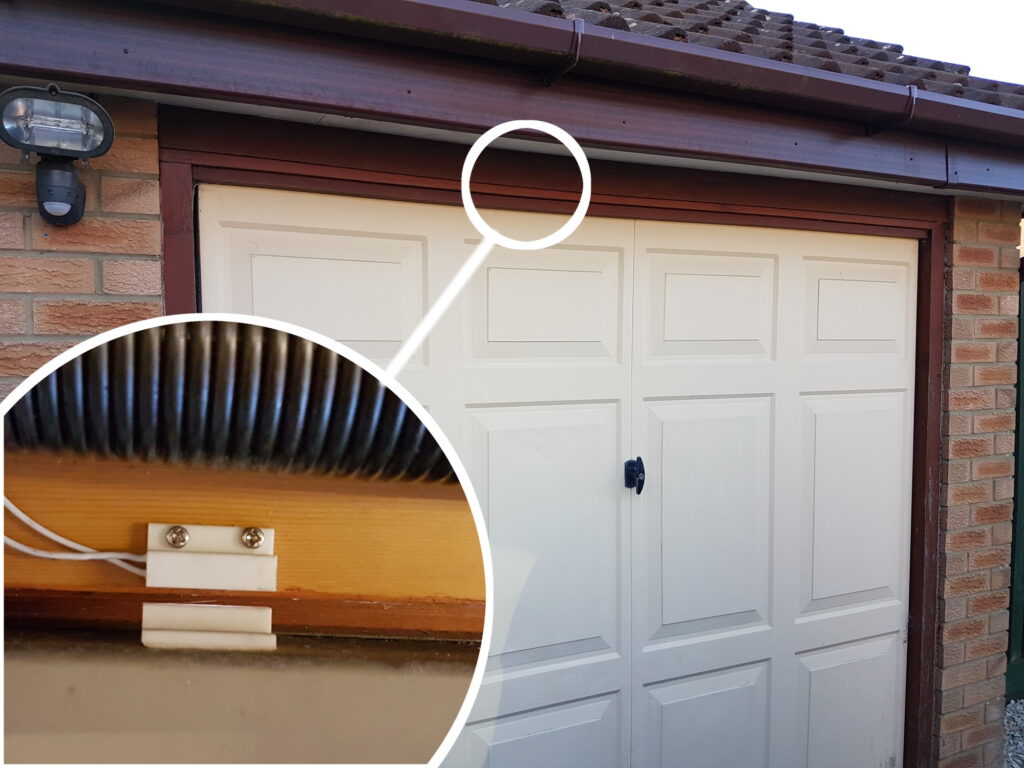
I wanted to use this feature to display the status of my two garage doors. They have magnetic switches so I decided to configure motionEyeOS to display their status given the Raspberry Pi is already setup in the same location. The door switches connect a GPIO pin to 3.3V. When the door is opened, the connection is broken and the GPIO pin is pulled Low by the Pi’s internal pull-down resistors.

The monitoring command feature is described in the motionEye Wiki. In general it is the same as motionEyeOS with the exception of the file path you need to use.
To start with we can create a script to monitor a single GPIO pin. Make sure you have a working system and you can view your camera’s output via the motionEyeOS web interface.
Step 1 – Create Script
Using SSH connect to the Pi. SSH is enabled by default and you should use the “admin” user account with the password you set in the settings. If you haven’t changed the default password it will be blank but I recommend you set a decent password and don’t leave it on the default!
Navigate to the etc directory :
cd /data/etc/
and create a blank file named “monitor_1” :
nano monitor_1
The “1” refers to the camera with ID 1. If you have more than one camera you can add a separate “monitor_#” file for each one. A second camera can use “monitor_2” etc.
Type or paste the following :
#!/bin/bash

GPIO=17

test -e /sys/class/gpio/gpio$GPIO ||
  (echo $GPIO > /sys/class/gpio/export \
  && echo in > /sys/class/gpio/gpio$GPIO/direction)

val=$(cat /sys/class/gpio/gpio$GPIO/value)

if [ "$val" == "1" ]; then
 GPIO_text="HIGH"
else
 GPIO_text="LOW"
fi
echo "$GPIO:$GPIO_text"
echo 1 1>&2
Exit the nano editor using CTRL-X, Y and [Enter].
This file is also available from my BitBucket repository. It is better to copy the text from the monitor_1 file on BitBucket and avoid potential formatting issues on this webpage.
The “test” command checks if the GPIO pin has already been configured. If it has not two echo commands are run to set up the pin as an input. These will generally default to being tied Low with internal pull-down resistors. With no connections the value will be 0/Low. Connecting the pin to 3.3V will change the state to 1/High.
Step 2 – Make Executable
Now make this script executable :
chmod +x monitor_1
Step 3 – Test Script
To test that your script runs without error you can type :
sh ./monitor_1
The output should reflect the text defined in the echo statements and there should be no errors.
Step 4 – Reload Web-interface
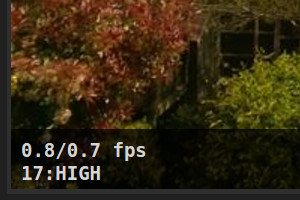
When monitor scripts are added, removed or edited the web interface needs to be reloaded in your browser for the changes to take effect. Clicking on the camera image will show the icons in the top right and the status of the GPIO in the bottom left :

Now change the state of the switch attached to GPIO 17. You should see the text change on the screen. The “17:HIGH” text can be changed to whatever you wish to define in the bash script.
Step 5 – Add Additional GPIO Reading
The bash script can now be modified to read more than one GPIO pin and the result can be combined into a single output to be displayed on the screen. In the example below the script checks GPIO 17 and 27. Their states are combined into a single output.
#!/bin/bash

GPIOA=17
GPIOB=27

test -e /sys/class/gpio/gpio$GPIOA ||
  (echo $GPIOA > /sys/class/gpio/export \
   && echo in > /sys/class/gpio/gpio$GPIOA/direction)
test -e /sys/class/gpio/gpio$GPIOB ||
  (echo $GPIOB > /sys/class/gpio/export \
   && echo in > /sys/class/gpio/gpio$GPIOB/direction)

valA=$(cat /sys/class/gpio/gpio$GPIOA/value)
valB=$(cat /sys/class/gpio/gpio$GPIOB/value)

if [ "$valA" == "1" ]; then
    GPIOA_text="HIGH"
else
    GPIOA_text="LOW"
fi

if [ "$valB" == "1" ]; then
    GPIOB_text="HIGH"
else
    GPIOB_text="LOW"
fi
echo "$GPIOA:$GPIOA_text  $GPIOB:$GPIOB_text"
echo 1 1>&2
This file is also available from my BitBucket repository. It is better to copy the text from the monitor_1_twin file on BitBucket and avoid formatting issues on this webpage.
Don’t forget to make it executable :
chmod +x monitor_1
Step 6 – Tweak Text
For my final script I adjusted the text display to be more relevant to my garage door situation. The script can be seen by following the BitBucket link to motion_1_doors.
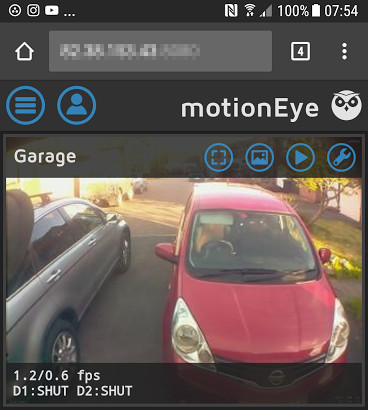
It outputs a line of text showing the status of each door. D1 is on the left and D2 on the right. The following screenshot was taken from my smartphone and now shows the status of the two garage doors :

One thing I noticed was that the update text was truncated on my Smartphone. I adjusted the text elements so this was avoided. It was the reason why I used “SHUT” rather than “CLOSED”. On my phone the limit appeared to be 17 characters but I suspect this will vary on other devices. On a desktop browser I didn’t have any issues with the text being truncated.
Script Frequency
By default the script is run once per second. You can change this by adjusting the number in last line at the end of the script :
echo 5 1>&2
This will tell motionEyeOS to not run the script for another 5 seconds.
The only disadvantage I could find with increasing the delay is that it also increases the time it takes to display the first reading when you initially click the camera image.
Troubleshooting
If it doesn’t work consider the following points :
- Make sure the file is executable
- Make sure the file has no extension
- Make sure it uses the correct camera ID (i.e monitor_1 for camera #1 etc)
- Double-check the syntax in your script
- Test the script on its own as shown in Step 3
- The script should return immediately and should not block
Note : I have used a “\” character in the Bash scripts shown above to split long lines. This was purely for display purposes. If you take a look at the BitBucket versions of monitor_1 and monitor_1_twin the “test” command is all on one line.
Final Thoughts
You will have to decide if this technique is going to suit your purposes. What it doesn’t do is provide any notifications or alerts. In my example it shows the current status of the doors but nothing else. How useful this is will depend on your expectations. However it’s certainly a useful feature to be aware of.


11 Comments
Excellent article – might have a play with the GPIO events.
Would this be easy to modify so an email is sent on alerts? Was thinking of a setting up door bell event monitor.
MotionEyeOS as built in settings for sending emails on motion events. My camera sees a lot of normal motion so I don’t use this feature. You can also get it to run custom scripts as well so you could trigger other notifications (SMS, Pushover etc).
Thank you for your help,
I want to read temperature and humidity with DHT11 sensor,could you help me with the strings?
Thank you
Take a look at my DHT11 Temperature and Humidity Sensor Tutorial.
That works well for an on-screen overlay, but can this be done for the image text itself? When running Motion on a full install you can update the text_left content with a web command (effectively a PUT), but that doesn’t seem to work in motioneyeos.
I’m not showing any of the overlay text i.e. d1 high or low
I followed everything to a T besides I had to use sudo to run a lot of the commands
I followed your trouble shooting guide and and the code is verbatim of what is posted
I do get an error that says this
“./monitor_1: 6: [: 0: unexpected operator”
but it still outputs the info correctly and works with high an low
Any ideas of what I could be doing wrong?
Thank you
any help is much appreciated
I’m just waiting for a new SD card to arrive but I am about to rebuild my garage camera with the new MotionEyeOS image. I’ll follow this guide and update if it I find anything that no longer works.
I’m seeing similar error message. Did you find out what causes it?
Thanks
This is great thank you. I hooked a Pi up to an Adafruit Powerboost 1000. It has a low battery alert pin that i was able to monitor within MotionEyeOS. So with your info and the ability to add Prowl notifications to the script I was able to receive low battery warnings and have the pi shut itself down.
Hi, I would like to take a picture triggered by grounding one the GPIOs.
How would I do that?
Thanks
Paulo
MotionEyeOS doesn’t currently support external triggers. It’s designed to work with motion detection.