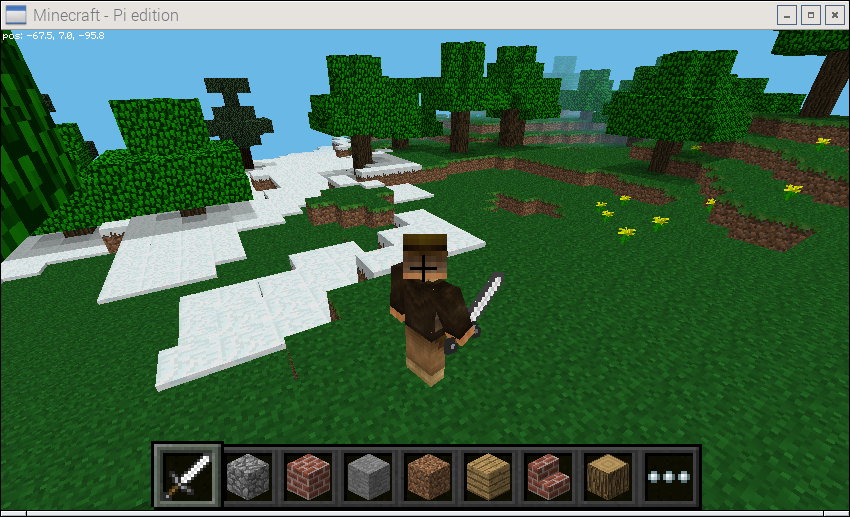
Everyone is familar with “Steve” the default Minecraft character and he looks very similar on all Minecraft platforms. It’s easy to change the Minecraft skin used to define how he looks and thanks to a few free sites you’ve got plenty to choose from.
I’m going to assume you are running the latest version of Raspbian where Minecraft is installed by default. If you are using an older image the directories mentioned below may be different. Given Minecraft must be run in desktop environment I’m going to do all the steps there as well.
I worked through this tutorial using a Pi 3 but it should be possible on any model.
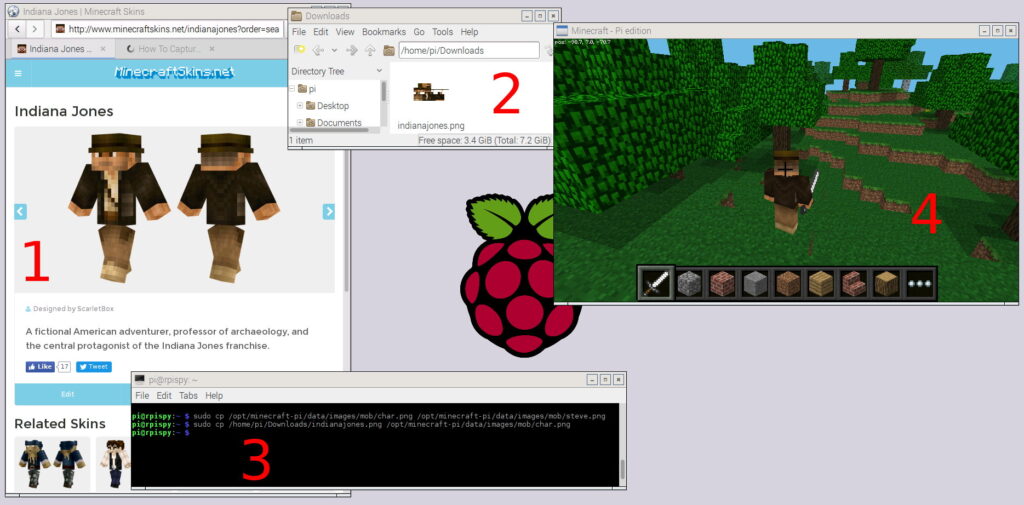
Step 1 – Download a Skin
Head over to one of these sites :
They all have an awesome selection of skins to download for free. They include characters from various categories such as movies, TV, games and fantasy.

Find a character you like and click the “Download” button. (Watch out for adverts pretending to be download buttons!)
Step 2 – Check the Downloaded File
The browser should have placed the file in the “/home/pi/Downloads/” directory. In my example the file is called “indianajones.png”. (Yes I know the picture above is Batman but I was too excited to maintain the level of consistency I usually try to maintain in my tutorials). You can check it is there by launching the File Manager using the filing cabinet icon on the menu bar at the top of the screen or “Menu > Accessories > File Manager”.
Step 3 – Backup Original Steve Skin
Open a terminal windows using the icon at the top of the screen or “Menu > Accessories > Terminal”.
Now we’ll make a backup of the original file by using :
cd /opt/minecraft-pi/data/images/mob/
sudo cp char.png steve.png
This is important so you can always restore the original skin.
Step 4 – Copy Files
Now we can copy our new skin over the original :
sudo cp /home/pi/indianajones.png char.png
Obviously you need to replace “indianajones.png” with the filename you downloaded if you chose a different character. Note the full stop (period) at the end of the command above which means copy the indianajones.png file from /home/pi/ to our current location.
Step 5 – Run Minecraft
We are all done now!
Run Minecraft using the “Minecraft Pi” menu option. It’s under “Games” although you probably worked that out yourself!
Once in the Minecraft World press the [ESC] key. This will take you to the “Game menu”. Press the second icon in the top left hand corner to change the view of the camera. Click the “Back to game” button.
Your character should have a new skin and you can watch him/her walk about and build/destroy blocks.

Step 6 – Fix Skin Issues (optional)
Some of the skins available from the sites I have linked to are not quite in the correct format. They need to be 64×32 PNG files use an RGB palette. If you get a skin that appears to be distorted when you run the game this script should fix it.
Quit Minecraft and download the script directly to your Pi :
sudo wget https://bitbucket.org/MattHawkinsUK/rpispy-misc/raw/master/minecraft/minecraft_skin_fixer.py
You can have a quick look at the content using :
cat minecraft_skin_fixer.py
Then run using :
sudo python minecraft_skin_fixer.py
This will take the current “char.png” file, crop it to 64×32 and convert to RGB.
Run Minecraft again and hopefully the skin will now look better.
One limitation with the Pi edition of Minecraft is that in normal use you can never see Steve’s face. It is possible to fix the camera in a set position looking directly down using the Python API and walk Steve into view. I used a Python script on Github by hashbangstudio to fix the camera and take this screenshot of Dr Jones’ face :

Some skins work better than others. If you get any strange graphical effects you may have to choose a different character.
You can always restore the original using :
cd /opt/minecraft-pi/data/images/mob/
sudo cp steve.png char.png
Happy modding!
Remember you can always take screenshots of your new character using my how to take Minecraft screenshots on the Pi tutorial.


5 Comments
Thanks, my daughter loved this.
“then we will copy our new skin over the original :
sudo cp /home/pi/indianajones.png .
”
Should be
sudo cp /home/pi/indianajones.png char.png
which is made clear when explaning how one put back the old one.
Have not yet tested, but assume you can make your own skin on nova skins too and use.
Thanks for the update. I’ve corrected the line now.
I assume that if you play multiplayer everyone displays as your skin?
it is great ;D
Very interesting, i loved the selection of skins, and now i have a cool, fancy character skin to show off while i build my current project: watermelon cafe.