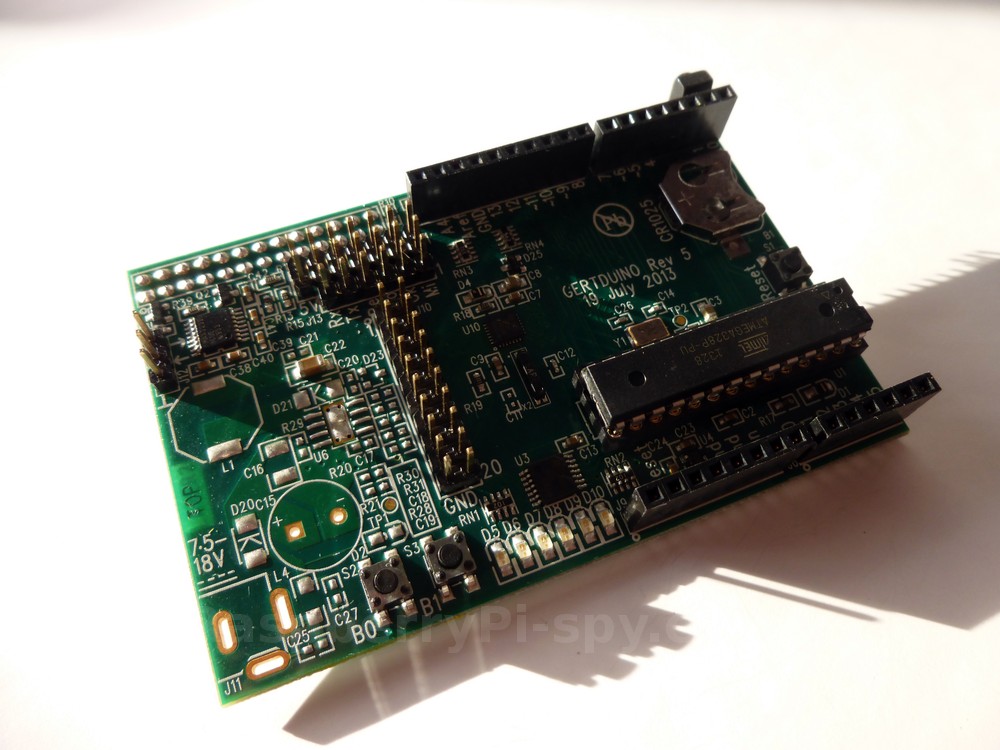
In my Introduction to the GertDuino I explained how it allows the Pi to compile and send code to an Atmega328 micro-controller. In this post I will explain the steps you need to take to get it up and running with an example program called “blink”.
The example is fairly basic and turns on the onboard blue LEDs. Once completed you will have a working system ready for your own experiments. When I started I had never used an Arduino so hopefully this post will help simplify some of things that confused me when I took the board out of the box.
Initial Setup
Before connecting your GertDuino board to the Pi you need to make a small change to the config.txt file on your SD card. Without this tweak the GD board will cause the Pi boot into safe mode as it grounds Pin 5. This doesn’t help at all so it’s best to disable it before we start.
Add the following to your config.txt file (which is in the /boot/ directory) :
avoid_safe_mode=1
You can use any text editor you prefer but to do it using nano type :
sudo nano config.txt
Add the line and then quit using CTRL-X, Y then ENTER.
Shutdown the Pi using :
sudo halt
When it has finished shutting down remove the power supply.

Prepare The Board
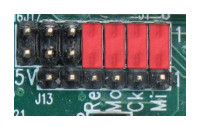
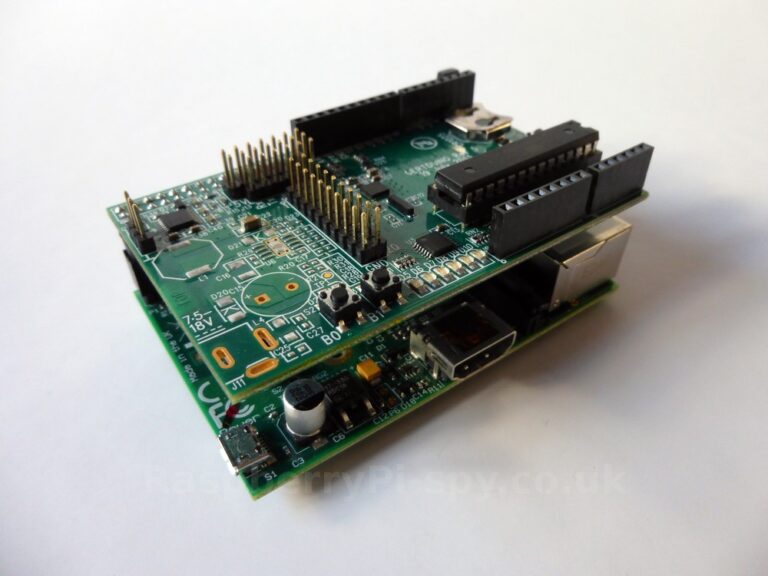
 In order to program the board from the Pi we need to add four jumpers. Once these are in place connect the board to the Pi GPIO header. The rubber bumper should rest on the USB port giving the board some support.
You can now reattach the power to the Pi and let it boot up. Once you have logged in and you can see the command prompt we are ready to continue.
Install Software
First we need to install a cross-compiler. This will allow the Pi to compile code which can be run on the Atmega devices.
sudo apt-get update
sudo apt-get install arduino
The update step is important as it ensures the latest Arduino package is installed. This may take 5 minutes so go grab a coffee/tea/water/IrnBru.
Next we need a program called “avrdude” which will allow us to load the code into the Atmega devices. Gordon Henderson (projects.drogon.net) has created a modified version which allows us to make use of the Pi’s GPIO pins for the transfer :
cd /tmp
wget http://project-downloads.drogon.net/gertboard/avrdude_5.10-4_armhf.deb
sudo dpkg -i avrdude_5.10-4_armhf.deb
sudo chmod 4755 /usr/bin/avrdude
Initial Device Setup
Before using the board for the first time we need to setup the Atmega328 to use the external 16MHz crystal :
avrdude -qq -c gpio -p atmega328p -U lock:w:0x3F:m -U efuse:w:0x07:m -U lfuse:w:0xE7:m -U hfuse:w:0xD9:m
If you didn’t understand all the details in the line above then welcome to the club! It’s one of those commands you’ll have to just run and worry about another time. If you’ve forgotten to add the four jumpers you’ll get an error message.
Download Examples
The last step is to grab some example files. In this case we will use the files supplied by Element14 on their GertDuino resource page.
cd /home/pi
wget http://www.element14.com/community/servlet/JiveServlet/downloadBody/64547-102-2-287143/gertduino.zip
unzip gertduino.zip
The files will be extracted to a directory named “gertduino”. We can now open this directory to find the source code (blink.c) and compiled hex file (blink.hex).
cd gertduino
cd blink
The hex file for this has already been created but you can use the “make” command to re-compile it :
make
You will need to do this for your own source code or if you modify the blink.c file. To tranfer the hex file to the Atmega we are going to use a program called “program_328”. This application is already included in this directory but we need to make it executable by tweaking its permissions :
chmod 777 program_328
Finally we can send the blink hex file to the Atmega 328 chip by using :
./program_328 blink.hex
You should see an output similar to that below :
avrdude: AVR device initialized and ready to accept instructions

Reading | ############################################ | 100% 0.00s

avrdude: Device signature = 0x1e950f
avrdude: NOTE: FLASH memory has been specified,
         an erase cycle will be performed
         To disable this feature, specify the -D option.
avrdude: erasing chip
avrdude: reading input file "blink.hex"
avrdude: input file blink.hex auto detected as Intel Hex
avrdude: writing flash (594 bytes):

Writing | ############################################ | 100% 0.34s

avrdude: 594 bytes of flash written
avrdude: verifying flash memory against blink.hex:
avrdude: load data flash data from input file blink.hex:
avrdude: input file blink.hex auto detected as Intel Hex
avrdude: input file blink.hex contains 594 bytes
avrdude: reading on-chip flash data:

Reading | ############################################ | 100% 0.32s

avrdude: verifying ...
avrdude: 594 bytes of flash verified

avrdude: safemode: Fuses OK

avrdude done.  Thank you.
If everything has gone to plan the six blue LEDs on the GertDuino board should be turning on and off in sequence.
Your first steps in Pi-Arduino fun is complete, congratulations!


16 Comments
Thanks for the clear tutorial. I played with this thing on and off for a couple weeks now and never figured out setting the external clock for the 328. That puts me over the hump.
Hi, and thanks for your work. I get an error with the clock settings, which is:
“$>avrdude -qq -c gpio -p atmega328p -U lock:w:0x3F:m -U efuse:w:0x07:m -U lfuse:w:0xE7:m -U hfuse:w:0xD9:m
avrdude: invalid file format ‘m ‘ in update specifier
avrdude: error parsing update operation ‘lock:w:0x3F:m ‘
$>”
I’ll search deeper later…
The error is caused by the extra blanks in the command after the m in the lock statement, try this command, it worked for me:
extra blanks was here V
avrdude -qq -c gpio -p atmega328p -U lock:w:0x3F:m -U efuse:w:0x07:m -U lfuse:w:0xE7:m -U hfuse:w:0xD9:m
Hi. This may be a silly question but how compatible is the GertDuino with a Raspberry Pi Model A? The model without an ethernet port and only one USB port.
The Gertduino should work fine with the Model A. It just needs the GPIO header and that is the same on both Models.
I’ve been tinkering with the atmega328 on my gertboard and I’m just about to start with gertduino.
Does avrdude know whether I have a gertboard or gertduino plugged in. I’ve already set it to run at 12mhz for the gertboard, if I set it again for gertduino as described above, what if I later plug in the gertboard again?
Is it just about which board I select in the Arduino IDE? This is new to me, so no doubt a bit elementary.
Thanks.
I’ve come from a background of programming my arduino from OSX, and so I am not sure what the makefile is, or how to get this working using the GUI on raspbian. Is there any suitable background on this?
Thank you! My gertuino’s LEDs are now twinkling sweetly.
My Raspi wouldn’t boot when I initially connected the Gertduino, so I had to follow the instructions
here
to erase the Atmega48, by putting the 4 jumpers as per page 7 of the Gerduino manual, and then using the command
avrdude -c gpio -p m48 -e -F
Great. I tried getting mine going on my own and I stumbled in a few places. This tutorial answers everything I was doing incorrectly. Thanks very much. On another matter, does the Raspberry Pi have an easy way to bridge code that will run user input/output through a webserver and interact with the Gertduino? What I’d really like to do is have a WEB based GUI control panel to interact with hardware attached to the Gertduino. As an example, something like a radio button/knob that will start a servo motor going and feedback that will display its position on the browser.
great tutorial! thank you so much.
http://youtu.be/R4PJ3MWoE3I
In this video the youtuber gets the Gertduino to shutdown the raspberry pi. I wonder how he did it? I’m looking for a method of doing the same for a solar powered project.
Hi there,
somebody know how can I connect my Gertduino directly to my Mac and compile my software?
Or this is completly impossible?
thanks for any help.
I followed all the step, however despite my blink.c file compiled properly, the hex file doesnt get my gertduino LEDs to blink in order. In fact non of the LEDS blink. any step that i might have missed out ?
I have the same problem as ALI BOY (July 17, 2015)
The blink.hex file was transferred properly (check was ok) but nothing happened (all LEDs are off)
Have I something to do after the transfer to start program on the ATmega?
What can I do?
Pls help, thank you !
So after much tearing of hair I found your later FAQ and discovered that my Atemga48 had been “preprogrammed”. Another symptom of this was that 5 leds were always on.
I erased the Atmega48 as per your instructions – but with -p m48 (as m48pa was not recognized). Then things got better – the program_328 script appeared to work, and output exactly as you described, with 594 bytes verified. However, I do not see any LEDs blinking in succession.
If I run ./reset_off, I see one LED blink momentarily, but that is it. What do you think I am missing here?
I have followed the instructions carefully. I get exactly the output you show from my gertduino (in response to the program_328 command). I do not get flashing LEDs.
Could this be a problem using this with the Raspberry Pi 2 model B?