Creating a Raspberry Pi screenshot is useful if you need to keep a record of your project or share details with others. You can capture screen grabs using a command line utility called Scrot.
It is easy to use and provides lots of options. It allows delayed captures and the ability to choose the capture area with the mouse.
Scrot Installation
If you are using the latest version of Rapberry Pi OS then scrot may already be installed and mapped to the “PrtScn” key. Press the “PrtScn” and check if a png file has appeared in your home (/home/pi) directory.
Manually Install Scrot
If your Pi started on the command line launch the graphical interface by typing :
startx
Once the desktop has loaded open a terminal window. The installation can be completed using a standard apt call :
sudo apt install scrot
Basic Command Line Usage
Scrot has lots of features you can use but to instantly take a basic screen shot of the whole desktop you can use :
scrot
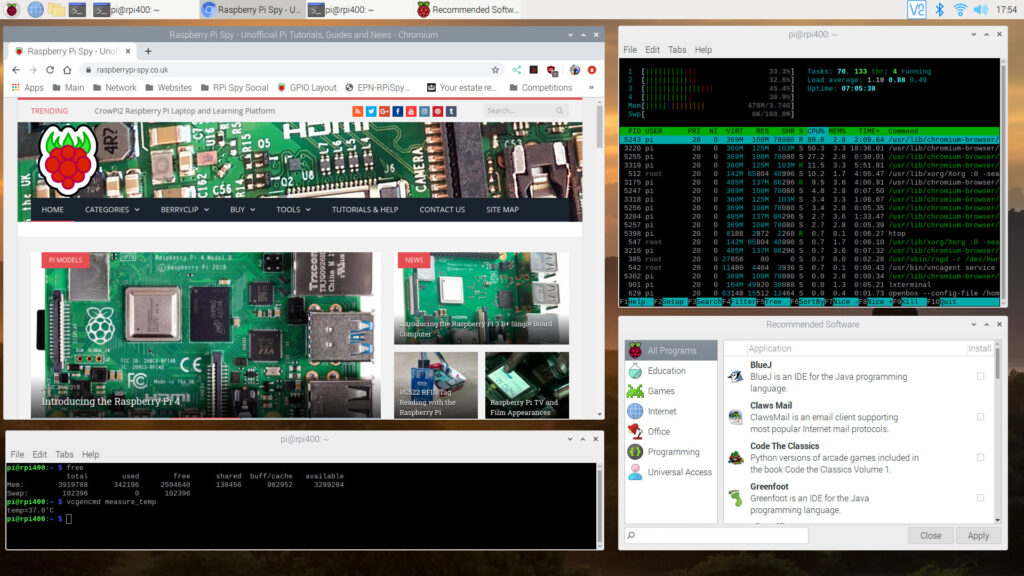
Here is an example Pi screenshot:

The default file name convention will give you a date, time and resolution stamped file such as “2013-10-03-221500_1920x1080_scrot.png”.
Delayed Pi Screenshot
To take a screen shot after a delay use :
scrot -d 10
where 10 is the number of seconds to wait before capturing the image. The image will be saved in your default user directory (i.e. /home/pi/). To add a countdown you can use the ‘c’ option :
scrot -cd 10
This feature gives you time to move the mouse and allow pop-menus to appear.
Specify Pi Screenshot Filename
To specify a file name and location you can use :
scrot /home/pi/myscreen.png
You can change the output format used by changing the file extension. For example :
scrot /home/pi/myscreen.jpg
PNG is a better format for screenshots as it uses lossless compression which keeps edges nice and sharp.
Advanced Usage
Scrot has a lot of other useful features which can be enabled with additional command line options. These include :
-h    Display additional help
-v    Get the current version
-d X  Add a delay of X seconds to the capture
-c    Add a countdown to a delayed capture
-s    Allow user to specific capture area with the mouse
-u    Capture the current active window
-q X  Specify the image quality percentage X (default 75)
-t X  Create thumbnail version at percentage size X
-e    Specify a command to run after the image is capture
The -s option allow you to drag an area with the mouse to capture.
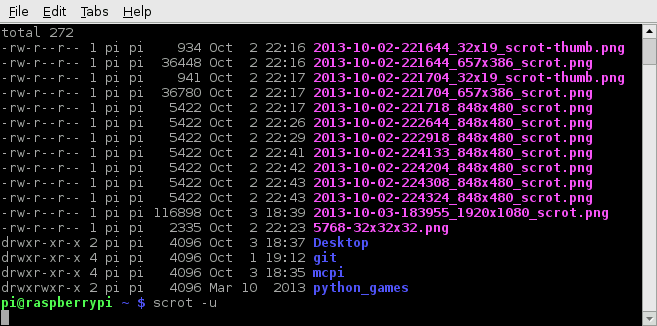
The -u option captures the current window. Combined with the -d option you can give yourself a few seconds to select the window you want to capture. In the example below I captured the LXTerminal window I was using to run Scrot:
The -t option will create a second image that is a smaller version of the main image. The thumbnail has the same file name as the main image but with “-thumb” appended on the end.
In this example we will get our capture file and a thumbnail that is 25% smaller :
scrot -t 25 myexample.jpg
The resulting files will be myexample.jpg and myexample-thumb.jpg.
Special Strings
Both the -e and filename parameters can take special “format specifiers”. This are replaced with data when they are encountered by Scrot.
There are two types of format specifier. Characters preceded by a ‘%’ symbol are
are interpreted by the standard strftime function. See man strftime for examples. These are commonly used to refer to dates and times.
The second kind are Scrot specific variables and are prefixed by ‘$’. The following specifiers are recognised:
$f  image path/filename (ignored when used in the filename)
$m  thumbnail path/filename
$n  image name (ignored when used in the filename)
$s  image size (bytes) (ignored when used in the filename)
$p  image pixel size
$w  image width
$h  image height
$t  image format
$  prints a literal '
For example :
scrot '%Y-%m-%d_$wx$h_scrot.png' -e 'mv $f ~/home/pi/images/'
creates a file called something like 2013-10-03_1920x1080_scrot.png and then moves it to an images directory.
Raspberry Pi OS PrtScn Button
In the latest version of Raspberry Pi OS the PrtScn button will automatically take a screenshot and save the image in the users home directory (/home/pi).
You can change the default location by editing the lxde-pi-rc.xml file:
sudo nano /etc/xdg/openbox/lxde-pi-rc.xml
Find the line “<command>scrot</command>” and replace “scrot” with:
scrot '/home/pi/Pictures/%Y-%m-%d-%H%M%S_$wx$h_scrot.png'
Save the file and return to the command line using CTRL-X, Y, ENTER.
Finally reboot the Pi. The “PrtScn” button will now save screenshots in the /home/pi/Pictures directory.


10 Comments
Very usefull !
I was looking fur this…
Thanks..
scrot is an X11 program, fbgrab grabs a frame buffer, but how do I get a screenshot from
an egl program such as RPIGears or from hardware decoded video (omxplayer)?
vc_dispmanx_snapshot
http://www.raspberrypi.org/phpBB3/viewtopic.php?p=376546
Hi there! Thanks a lot for the tutorial. You helped confirm that what I was trying made sense.
Hey, I am trying to take screenshots for Minecraft on the Pi (Minecraft Pi Edition). For some reason, the Minecraft window shows up black when taking a screenshot with scrot. Does anyone know how to fix this? The people I have asked suspected that Minecraft Pi is using OpenGL, so for some reason graphics from the GPU are bypassing whatever scrot is trying to do.
Hoping to avoid the bootleg record the screen with a smart phone trick . . . thanks!
Scrot can’t take screenshots of the Minecraft window because of the way the image is generated. Apparently raspi2png can do it but I haven’t tried it myself :
https://github.com/AndrewFromMelbourne/raspi2png
Thank you very much for the article. I really helped a lot. 🙂
Very useful
From reading the post, it appears you have to issue the command everytime. No such things as “PrintScreen” key equivalent of MS-Windows? (or any other key for that matter)
Unfortunately not. I guess there must be a way to bind a command to a keyboard key sequence but I don’t know enough about Linux to do that.
UPDATE: The latest Raspberry Pi OS image now maps Scrot to the PrtScn button. This article now includes instructions on changing the default save location when using the print screen button.