During my time with the Pi I’ve experimented with various devices and sensors. Here is my Top 10 list of devices to connect to the Raspberry Pi. In most cases they are very cheap and easy to interface and are great building blocks for more complicated future projects. I’ve included links to more detailed posts where I can and many of these include example Python scripts to help you get going.
From robot cars to security systems there are plenty of ways of combining these mini-projects into some amazing creations! If you need to buy a present for a Pi owner then these are good starting point.
Ultrasonic Module
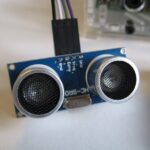
Ultrasonic transducer modules are an easy way to add distance measuring capability to your Pi. The device shown in the photo has 2 power pins, 1 trigger pin and 1 echo pin.
Take a look at my “Ultrasonic Distance Measurement Using Python” posts to see how you can connect one to the GPIO header and read it via a simple Python script.
PIR Movement Sensor
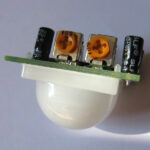
Simple “Passive Infra-Red” sensors allow you to detect movement. The sensors I found on eBay only cost a few pounds. They have three pins which can be connected directly to the Raspberry Pi’s GPIO header. These are great for security systems or robotic sensors.
An example python script can be found on the “Cheap PIR Sensors and the Raspberry Pi” page.
Stepper Motor
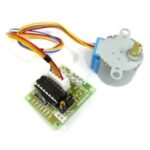
This was one of the first bits of hardware I attempted to control from the GPIO. The stepper motor came with a controller board which interfaced directly with the GPIO. You feed the device a sequence of inputs and it turns the motor.
Instructions and some example Python can be found on my Stepper Motor Control In Python page.
16×2 or 20×4 Character LCD Display
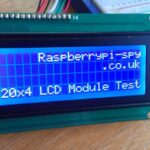
16 or 20 character LCD displays are cheap to buy and easy to hook up to the GPIO pins on the Pi. I wrote articles about the 16×2 LCD and 20×4 LCD screens both of which I got from eBay. It doesn’t matter which device you get as long as it is compatible with the “Hitachi HD44780” LCD controller. Luckily most are based on this very common controller.
With the addition of some basic components you can also adjust the brightness or turn the screen on and off.
USB to Serial Module
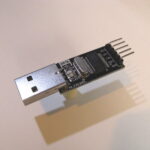
A USB to Serial device allows your Pi to communicate over a USB interface. The USB end can be plugged into a PC, Laptop or tablet and the pins can be connected to GPIO pins 8 and 10.
These pins are configured as a serial terminal interface by default and allow you to access the Linux command line from your PC or tablet. It is even possible to power the Pi from the host device if its USB port can supply enough power!
USB WiFi Dongle
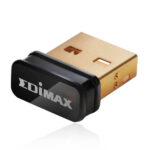
WiFi dongles are fairly cheap and a great way to connect your Pi to a network without cables. The Edimax 7811 is a popular choice and is easy to configure using the WiFi utility included with the latest Raspbian image.
I’ve also used an Edimax 7711 dongle.
Both Edimax dongles are available from Amazon.
Mini LCD Screen
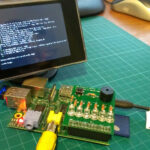
There are plenty of small screens available that accept a composite video input. Perfect for hooking up to the Raspberry Pi’s video output. Most of these screens are sold as car reversing camera screens, are powered from 12V and often have two video inputs available.
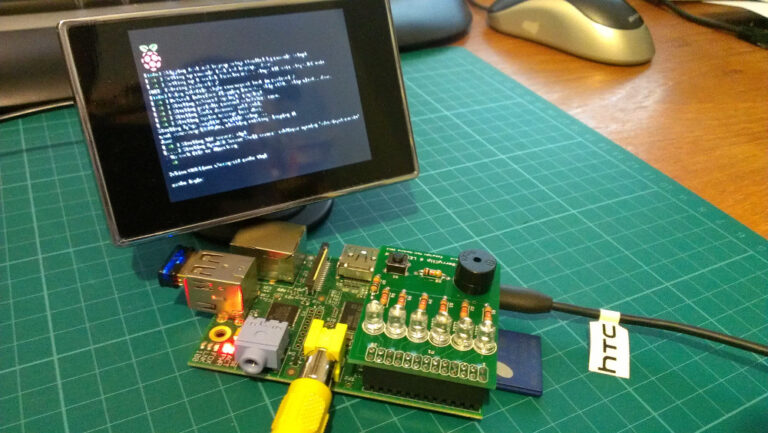
The one I’ve got was £16 on eBay and I wrote about it in my Cheap Miniature LCD Screen article. I also used it to create a Matrix Screen.
BerryClip 6 LED Buzzer Board
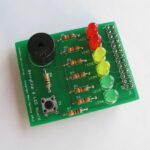
The BerryClip is an addon board for the Pi which plugs directly onto the GPIO header. It provides 6 coloured LEDs, 1 buzzer and 1 momentary switch. These can be controlled using whatever language you prefer but there are lots of example Python scripts to try.
For more details visit the BerryClip page on this site.
USB Bluetooth Dongle
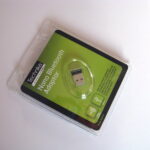
Bluetooth dongles are cheap and are readily available on the high street or online. I have successfully used a “Origo” branded device and a Tesco “Technika” Nano Bluetooth Adapter. The Tesco dongle cost £5 and isn’t much bigger than the USB plug itself.
A dongle allows you to connect various Bluetooth enabled devices such as keyboards, mice and Wii Controllers.
Nintendo Wii Controller

If you’ve got a Nintendo Wii then it is worth taking a look at my “Nintendo Wii Remote, Python and The Raspberry Pi” page. This explains how you can connect a Wiimote to your Pi and read the status of its buttons in Python. This opens up a whole world of remote control projects. Take a look at Nintendo Wii remote controllers on Amazon.
The YouTube video created by RasPi.TV gives you a taster of the possibilities!

7 Comments
Wii controller definitely my favourite. I’ve been developing this further. I want to be able to swing the flag using the accelerometers and Wiimote position. Lots of other possibilities too – including nunchuks and balance boards. That CWiid library is excellent. Thanks for the steer 🙂
Great list!
I just would add a servo and the Playstation Buzz controller: four people playing along!
An interesting project we have been experimenting with is extending the range of a radio controlled car from a few feet to the Internet.
The Pi is talking to a cloud-hosted WebSocket server, allowing a Web browser on a smartphone to send commands to it in real time. The Pi is mounted on an RC car, and controls the motors of the car.
Video and details available here: http://blog.kaazing.com/2013/04/01/remote-controlling-a-car-over-the-web-ingredients-smartphone-websocket-and-raspberry-pi/
Watching with interest – would love to produce a class set of datalogging devices using the pi. Motion sensor would need to stream continuous measurements (preferably thousands per second!) – is this pi in the sky?
Connect an Eggbot. http://www.instructables.com/id/How-to-Embed-a-Raspberry-Pi-into-your-eggbot/
In Pi, I wanted to browse to the file folder on my Android phone from Gmail so that I can attach a photo to an email. I am using the USB mini to USB cable to one of the USB ports on the Pi, but Pi does not detect the Android, even though the Android makes the connected tone when I plug into that port. Is there an app for that? I know we are dealing with different OS and need some sort of bridge between the two.
I’ve recently been toying with the idea of using a Raspberry PI as part of an automated or semi-automated chicken feed dispenser.